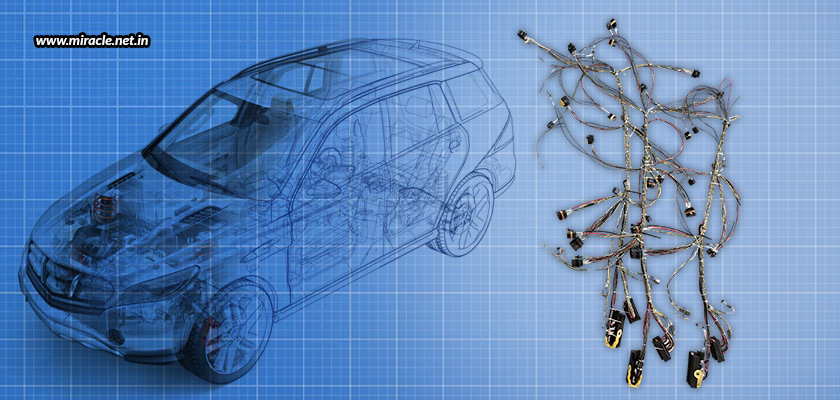
Automobiles, beneath the shiny exteriors, luxurious interiors, and high-performance engines, are a complex network of electrical systems. Lighting, engine management, safety features, and entertainment – modern vehicles rely on an intricate web of wires to operate seamlessly; and at the heart of this ecosystem is the automotive wire harness – an essential component that connects and powers nearly every system within a vehicle. The designing, assembly, and installation of these harnesses require not only high-quality materials, but also meticulous planning and rigorous quality checks to ensure safety and reliability. Let’s explore the fascinating journey of an automotive wire harness, tracing its path from the blueprint to its critical role of keeping vehicles running safely and efficiently.
Step 1: The blueprint
Every wire harness begins its journey at the design table, where engineers first create a blueprint that combines a wire harness design and the vehicle’s requirements. This includes everything from the electrical requirements to the environmental considerations.
- Electrical requirements: Engineers determine the current, voltage, and signal types each wire must carry. For instance, sensor connections require thinner low-voltage wires, while high-power components like motors need thicker cables.
- Routing and space management: Vehicles have limited space but require complex wiring. To satisfy this unique combination, designers use CAD software to plan the optimal path for each wire, avoiding interference with the others.
- Environmental considerations: Automotive wire harnesses face extreme conditions like temperatures, vibrations, moisture, chemicals, and electromagnetic interference. Materials should thus be chosen to withstand these challenges.
This stage involves a 3D design that includes a detailed electrical schematic, a routing plan, and a bill of materials that lists every wire, terminal, and connector required.
Step 2: Material selection
As mentioned above, the material selection plays a very vital role. There are a number of materials that can be used to create an automotive wire system. However, an automotive wire system is not made from a single material. The conductors, the insulation, the connectors, and other coverings all need different materials.
- Conductors: Copper and aluminium are two main materials, with copper known for its excellent conductivity, and aluminium used in high-voltage applications.
- Insulation: PVC, cross-linked polyethylene (XLPE), or thermoplastic elastomers are used for the insulation to protect wires from abrasion, heat, and chemicals.
- Connectors: Connectors need to withstand mechanical stress and vibration, which is why they need to be made of high-strength plastic with metal terminals.
- Protective coverings: Protective coverings serve the purpose of providing additional protection, the best being corrugated tubing, braided sleeves, and heat-shrink tubing.
The material selection needs to be very carefully done, because even a single wire harness failure can compromise vehicle safety or lead to costly errors.
Step 3: Cutting, stripping, and crimping
Once the materials are selected, automated machines are used to cut wires to exact lengths based on the design specifications. Thereafter, the insulation at the end of each wire is removed to prepare it for terminal crimping. This process of stripping must be precise so that there is no damage to the conductor. The terminal is then crimped so that the wire and terminal form an electrical and mechanical secure connection. For this, the stripped wire is inserted into a metal terminal, after which specialized machines compress the terminal onto the wire, creating a tight mechanical and electrical bond. Finally, the crimped terminals are assembled into connectors, which involves automated machinery, especially for high-volume production, ensuring precise placement and orientation.
NOTE: Each wire can be labelled with codes to ensure correct placement during assembly using inkjet printers or heat-shrink labels.
Step 4: Bundling and protective sheathing
Once the individual wires are prepared, they are bundled together through either taping, looming, or clipping and fastening. Taping involves wrapping the wires with adhesive tape to keep them tightly packed in place. Clipping and fastening involves the use of specialized clips, ties, and brackets to secure the harness in shape, ensuring that it maintains its form, and fits precisely within the vehicle’s limited space. Looming involves encasing the wires in protective corrugated tubing or braided sleeves, protecting them from heat, moisture, and other environmental hazards. These bundling techniques not only enhance durability, but also simplify installation and ensure the long-term reliability of the automotive wire harness.
Step 5: Testing and quality assurance
Once everything is done, the harnesses are then tested to ensure reliability and safety. Each harness undergoes rigorous checks such as continuity testing, insulation resistance testing, high-pot testing, and functional testing. Continuity testing ensures that electricity flows correctly through each wire and terminal; insulation resistance testing verifies that the insulation prevents unintended electrical contact; high-pot testing applies high voltage to detect insulation weaknesses; and functional testing simulates real-world conditions to check connector integrity and signal transmission. Companies like Miracle Electronics, a leading automotive wire harness manufacturer in India, exemplify this commitment to quality with advanced design, rigorous testing, and robust manufacturing processes. They ensure that every wire harness supports vehicle safety, optimal performance, and seamless integration of electrical systems across modern vehicles.
Step 6: Installation
The final installation step is where the harnesses are placed in the vehicle, each properly installed to play their own individual crucial role. The process includes routing, securing, connection, and final inspection. In routing, the harnesses are guided along the planned path, avoiding interference with mechanical components. The harnesses are then secured in place using clips, brackets, and ties. The terminals and connectors are then plugged into sensors, ECUs, lighting, and other systems. Once installed, the entire vehicle electrical system is then finally checked by undergoing testing to ensure proper operation. A well-installed wire harness guarantees that the vehicle’s electronics function reliably.
From the blueprint to the installation and final checking, the journey of an automotive wire harness requires engineering precision and rigorous quality control. Hidden beneath dashboards and panels, these intricate wire networks are the backbone of every vehicle’s electrical system. Careful designing, robust construction, rigorous testing, and perfect installation guarantee not just performance, but also safety and reliability over miles! And, as vehicles are growing increasingly advanced, the role of wire harnesses becomes even more critical, quietly supporting advanced technologies while connecting every system with efficiency. Their journey is the perfect blend of innovation, expertise, and durability.